Give your team access
Give someone access to the panel with a tailor-made role. It takes about 10 minutes.
Before you start
- Permissions: Roles and Creating new role; Users and Creating new user.
- To send the activation email you need SMTP email configured in Settings.
1. Create the role
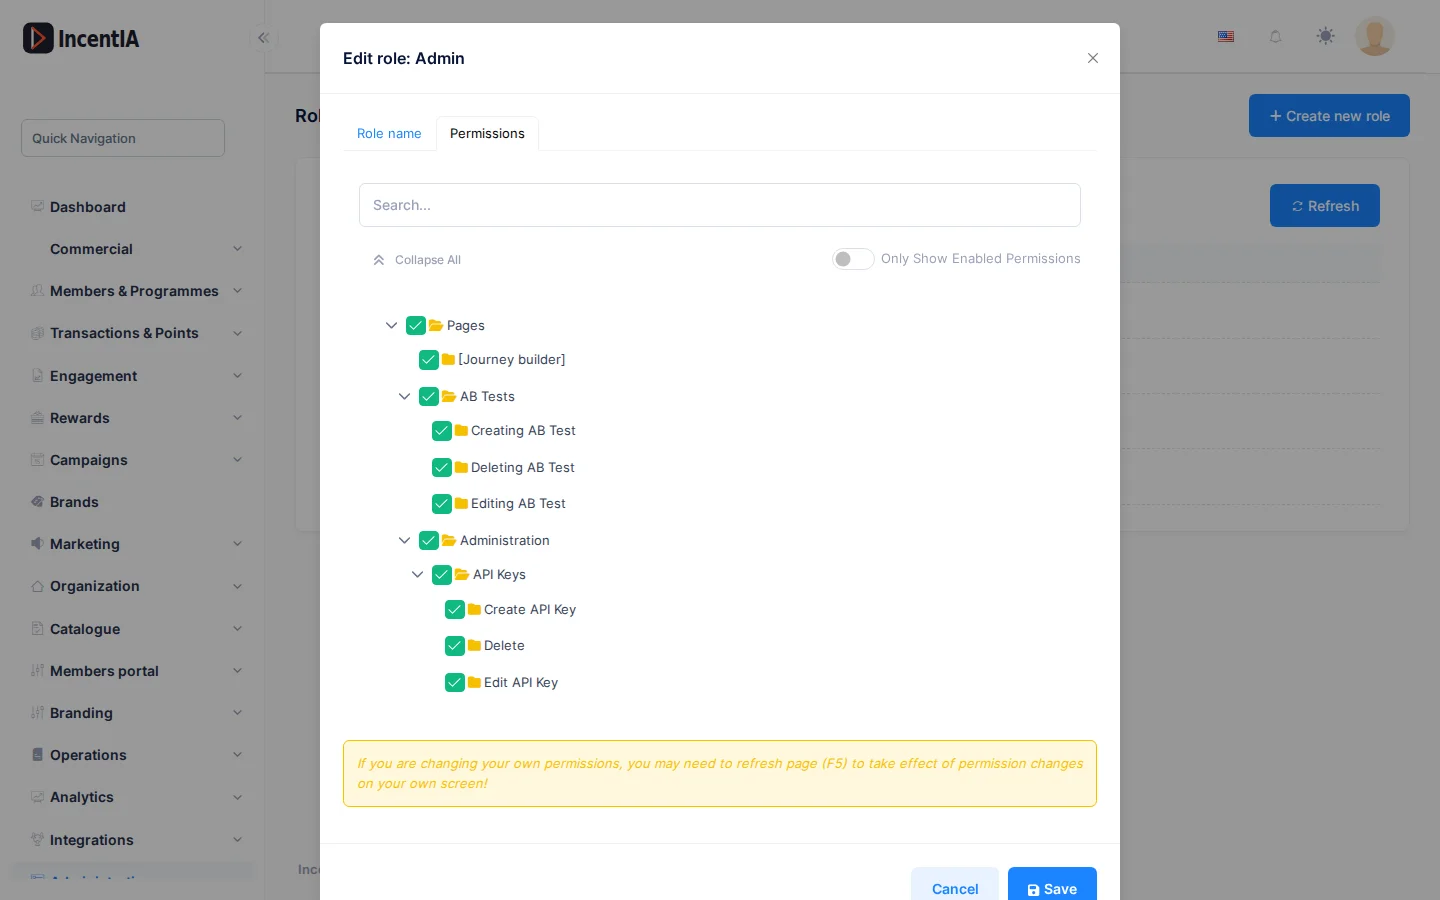
Go to Administration › Roles and click Create new role.
- Enter the Role name, for example
Customer support. - Open the Permissions tab and tick only what is needed. To give access to an action, also tick the permission for its screen.
- Save.
tip
Give each person the minimum they need. You can extend it later.
2. Create the user
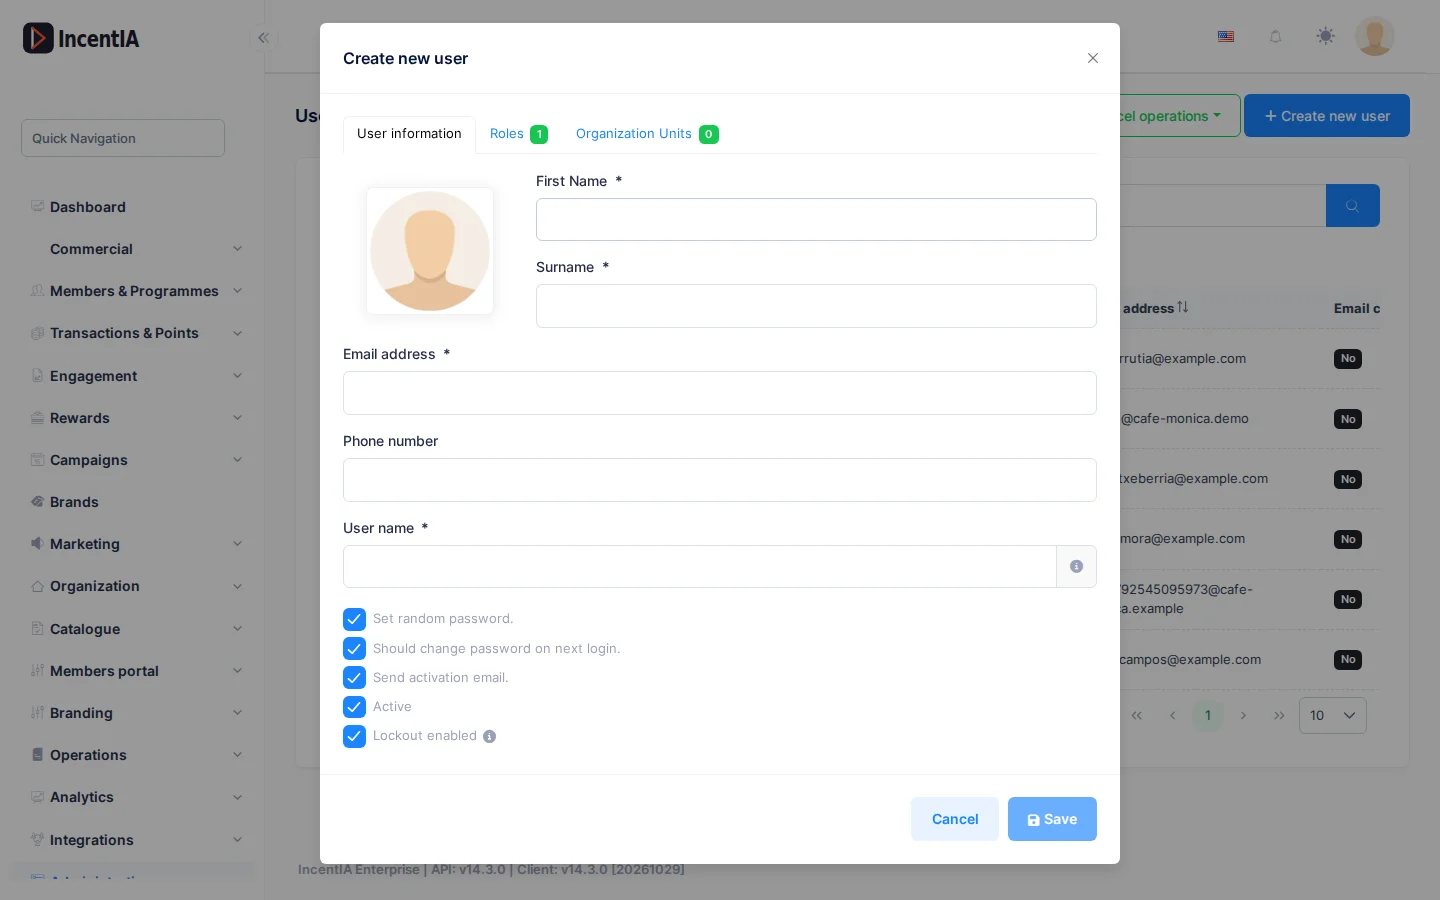
Go to Administration › Users and click Create new user.
- Under User information, fill in Name, Surname, Email address and User name.
- Tick Set random password. and Should change password on next login.
- Tick Send activation email.
- On the Roles tab, tick the role you created.
- Save.
3. Adjust one-off cases
If a single person needs an extra permission, use Actions › Permissions on their row. Reset special permissions leaves only those from their roles again.
If the person is locked out after failed attempts, use Actions › Unlock.
Check that it works
- Ask the person to sign in with their user name.
- They should see only the menu for their role.
- You can see it yourself with Actions › Log in as this user. It is recorded in the audit log.
Next steps
- Users and roles: organisation units and all the permissions.
- Roles and permissions
- Invite your field reps
- Audit log