Design a campaign landing page step by step
In this tutorial you build the sample landing page Acme Coffee — Verano Cold Brew: a summer promotion with a prize wheel, a registration form and legal terms. The steps are the same for any real campaign. Allow 45 to 60 minutes the first time.
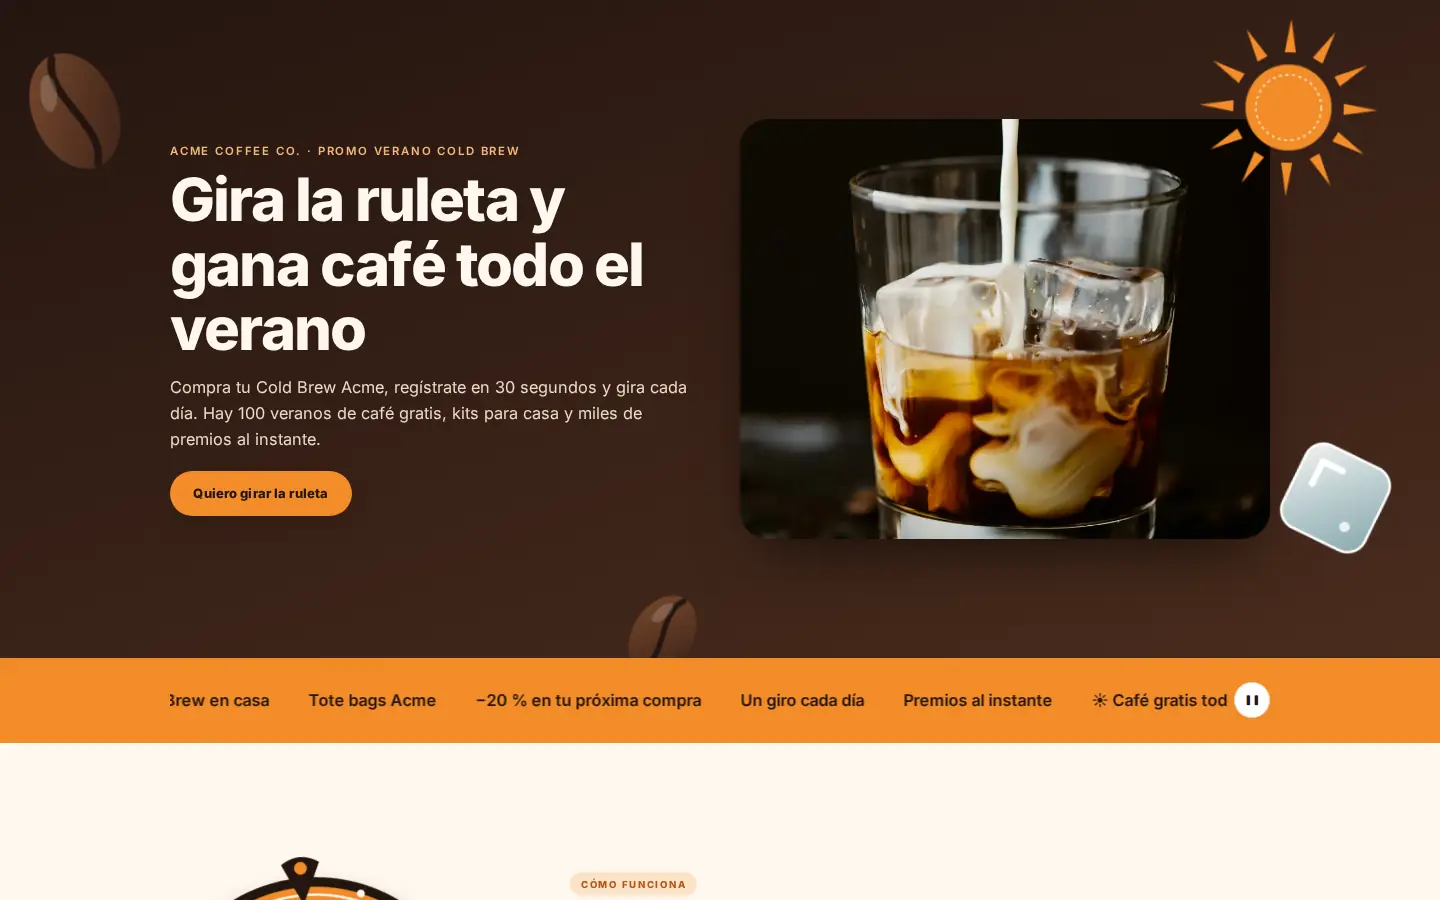
The finished page has 11 sections:
| # | Section | Blocks used |
|---|---|---|
| 1 | Hero with decorations (#inicio) | Hero + 4 decorations |
| 2 | Prize ticker | Marquee |
| 3 | How it works (#como-funciona) | Image (wheel) + Rich Text + Steps |
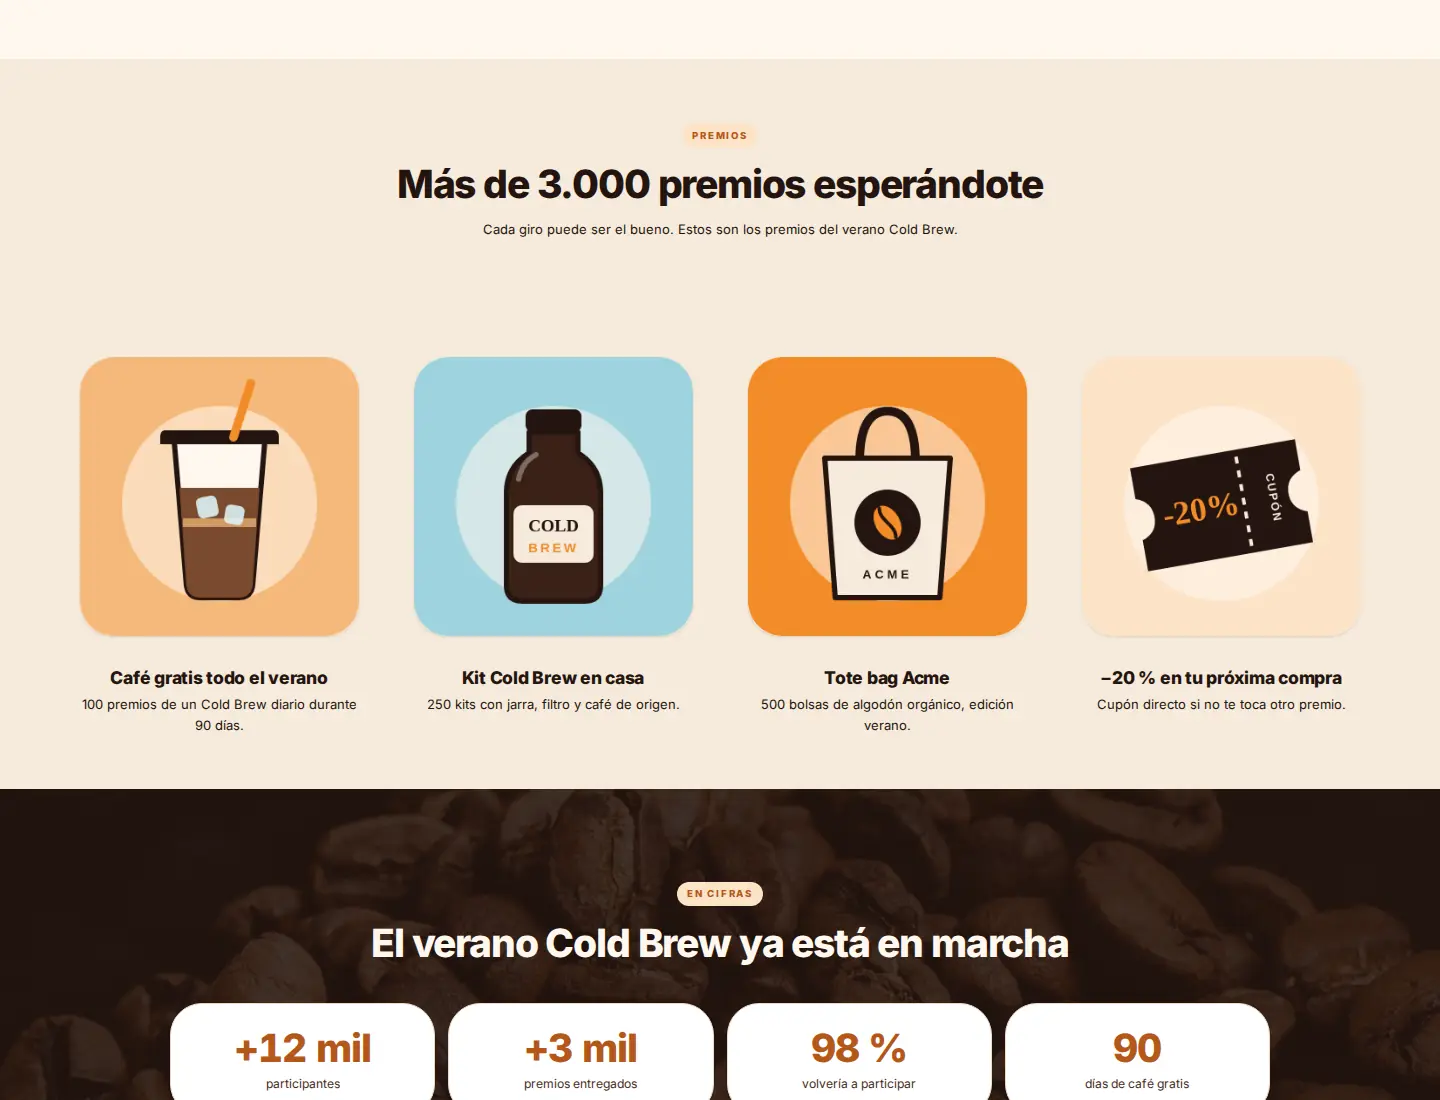
| 4–5 | Prizes (#premios, #premios-lista) | Rich Text + 4 columns with Image and Rich Text |
| 6 | Figures and reviews (#opiniones) | Stats + Testimonials |
| 7 | Countdown and final call | Countdown + Footer CTA |
| 8 | Registration (#participar) | Image + Registration with terms and privacy |
| 9 | FAQ (#faq) | FAQ |
| 10 | Terms and privacy (#bases) | Two FAQ blocks used as accordions |
| 11 | Legal footer (#legal) | Rich Text with links |
- Permission Landing Builder · Enterprise edition with the landing editor v2 enabled. To create brand kits you also need the Members portal permission.
- A saved campaign with its Landing Slug (URL). In the example:
acme-coffee-verano-cold-brew. See Create a campaign. - The legal terms and the privacy policy published as versions in Campaigns › Terms & Conditions. See Terms and conditions.
- Your images ready in JPG, PNG or WebP: main photo, one image per prize and the decorations (coffee beans, ice, sun).
1. Create the brand kit
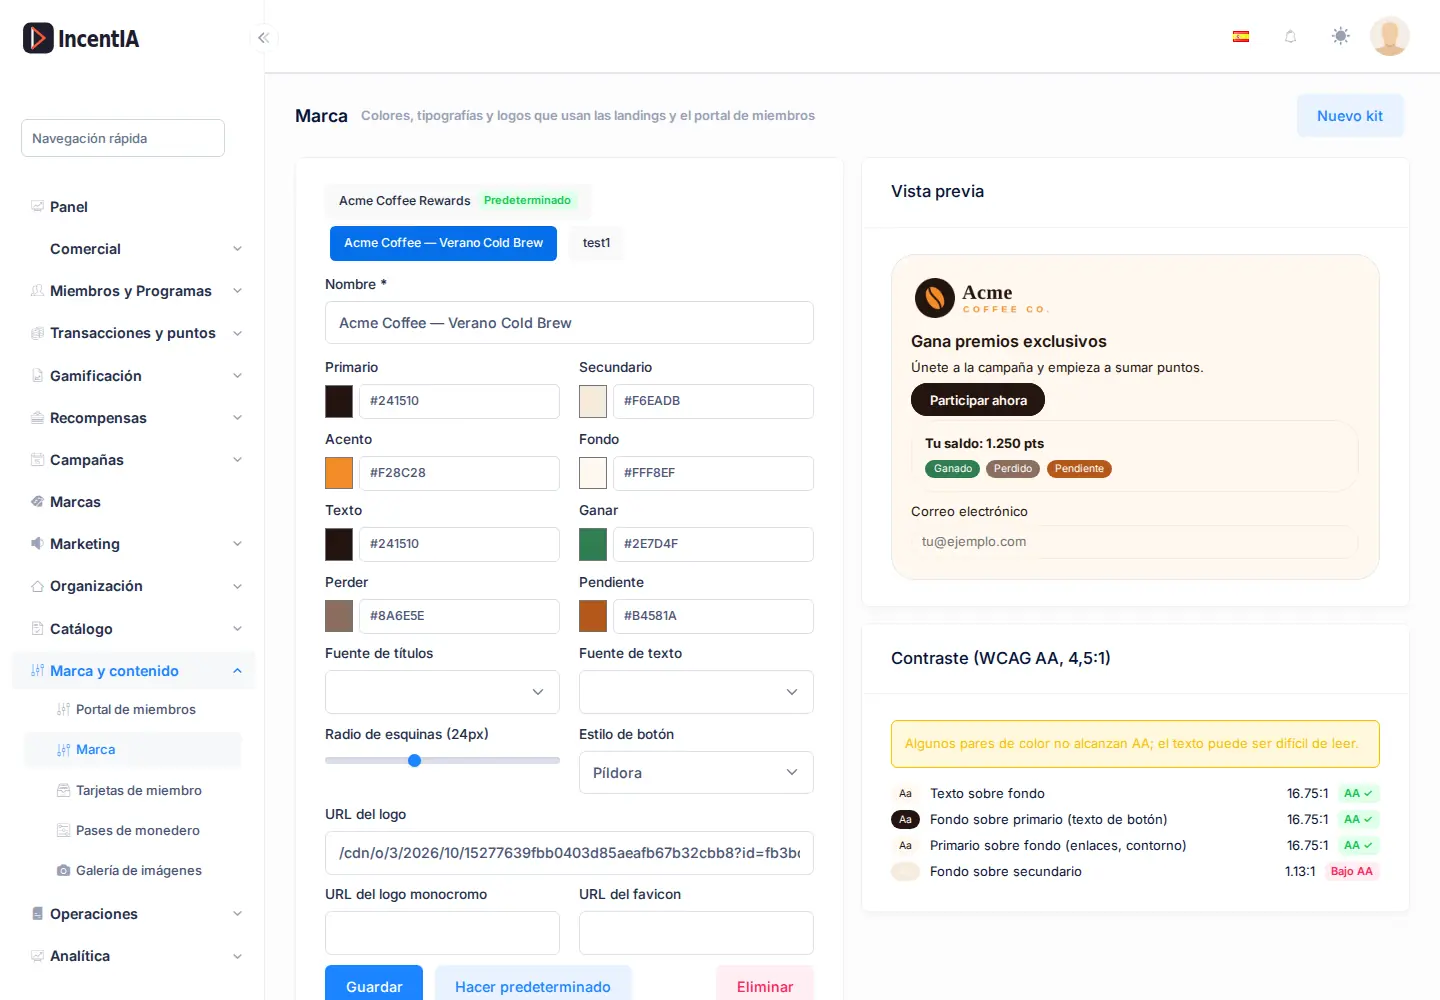
The brand kit holds the campaign colours, fonts and logo, so you don't pick colours block by block.
- Go to Settings › General brand kits and click New kit.
- Type the Name, for example
Acme Coffee — Verano Cold Brew. - Fill in the colours. In the example: Primary
#241510(coffee brown), Secondary#F6EADB(cream), Accent#F28C28(orange), Background#FFF8EFand Text#241510. Win, Lose and Pending are used in game results. - Choose Heading font, Body font, Corner radius and Button style (Pill in the example). Paste the Logo URL.
- Check Contrast (WCAG AA, 4.5:1): every pair should show AA ✓. If one shows Below AA, darken the text or lighten the background.
- Click Save.
2. Open the editor and assign the kit
- Open the campaign in Campaigns › All campaigns and click Edit Landing in the general tab.
- If the landing page is empty, click Save draft once. A kit can only be assigned to a saved page.
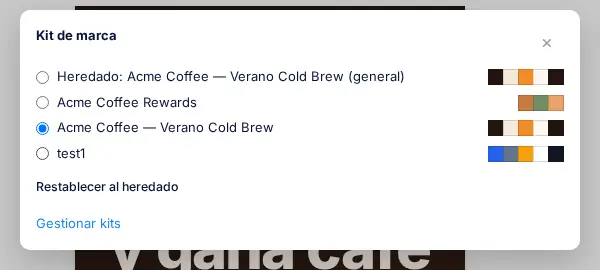
- Open ⋯ › Brand kit and pick your kit. Reset to inherited goes back to the account kit.
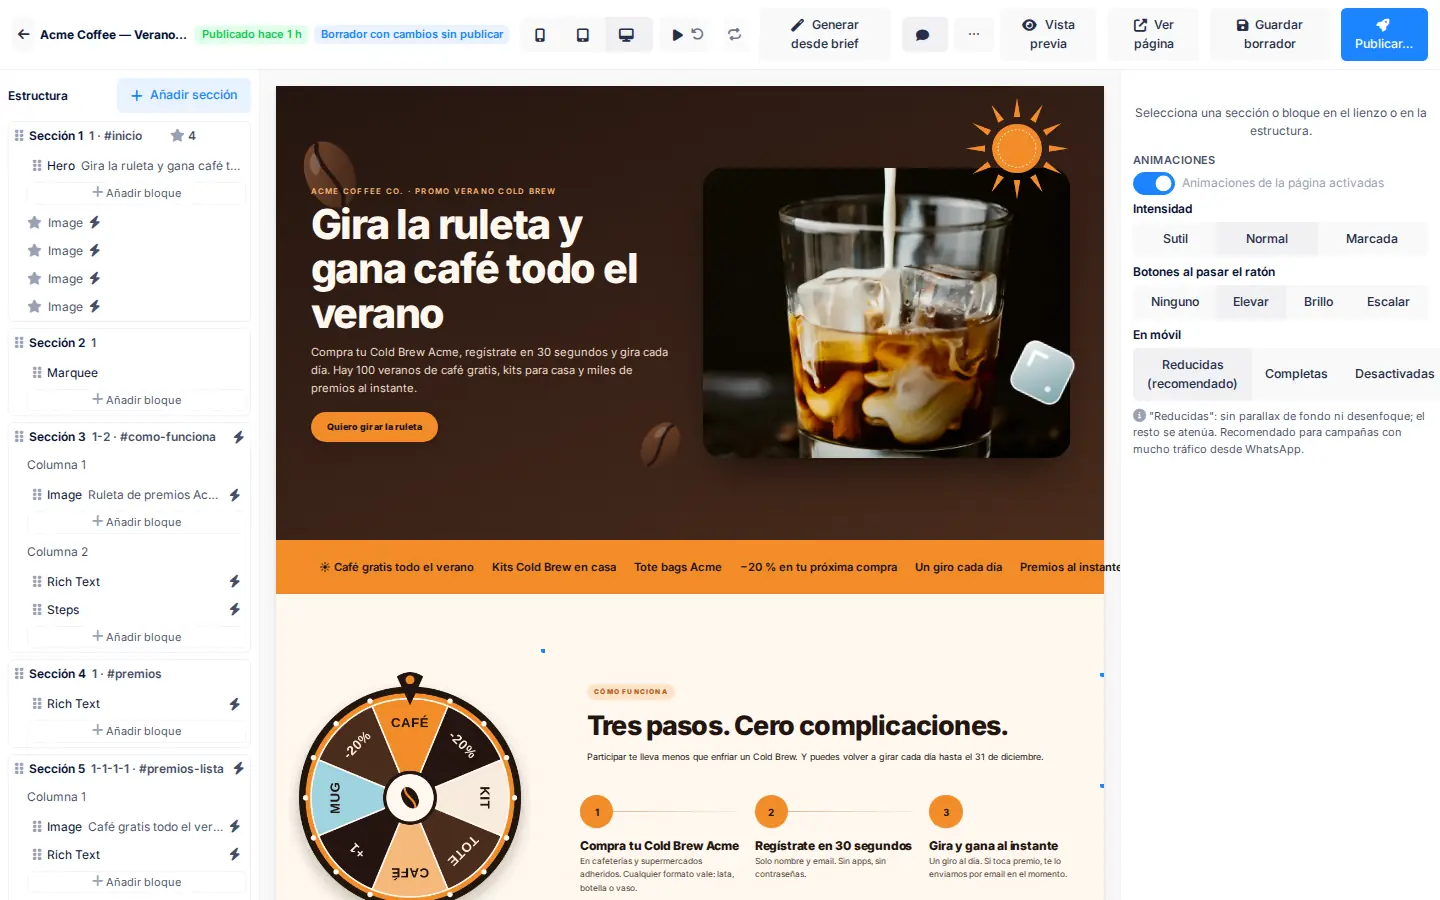
The editor has three areas. On the left, Structure lists the sections and their blocks. In the middle, the canvas is the real page. On the right, the inspector shows the properties of whatever you select. With nothing selected, it shows the page-wide Animations settings.
3. Add sections from the library
Click Add section above Structure, or the + between two sections on the canvas. You have two options:
- Empty columns: one column, two equal columns, 1/3 + 2/3, 2/3 + 1/3, three columns, four columns or sidebar.
- Ready-made sections: they come with sample blocks and copy. Filter by category (hero, mechanics, prizes, social proof, legal, closing).
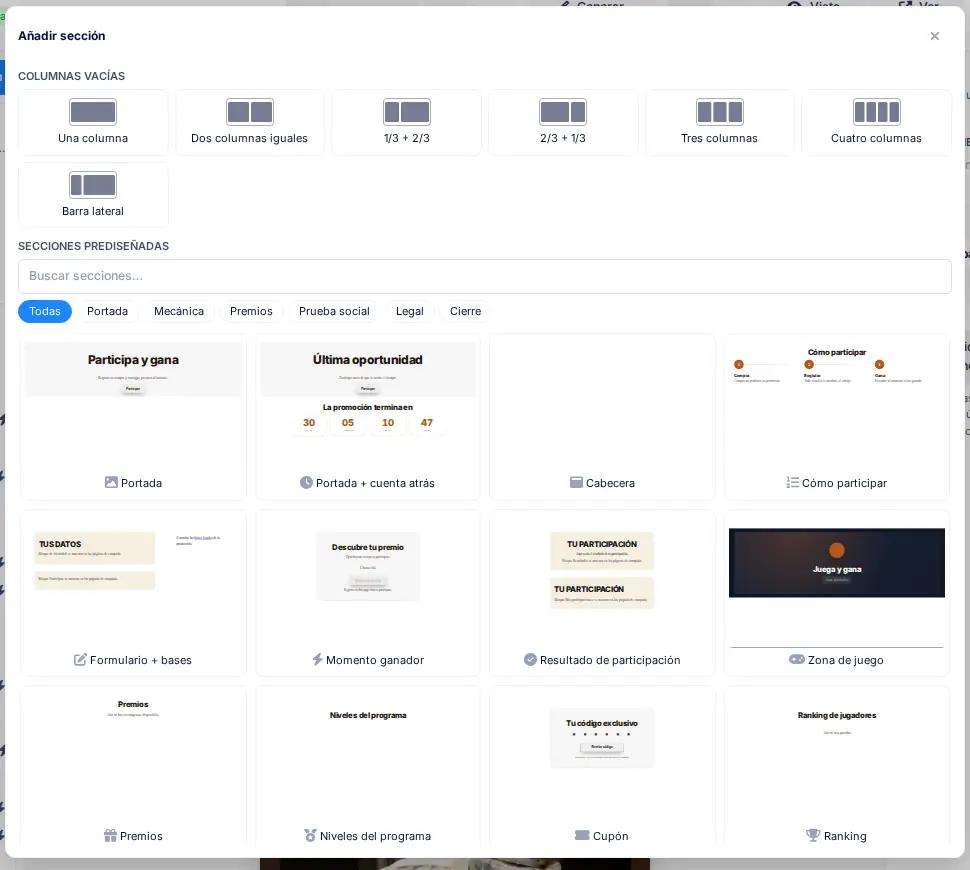
For Acme, start with a hero, how to take part, prizes, key figures, testimonials, hero + countdown, form + terms and a legal section. Then adjust each one.
To add a single block, click Add block inside the column. Search by name or browse the groups.
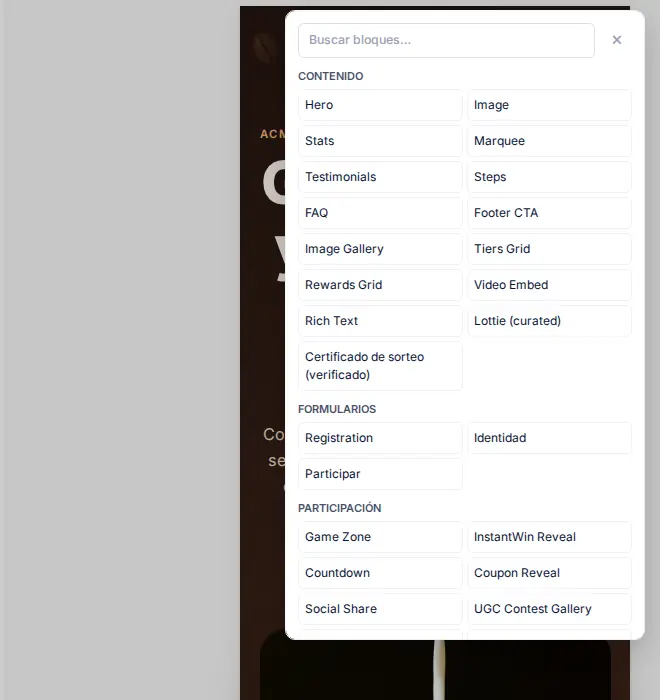
Drag sections and blocks in Structure to reorder them. Double-click any text on the canvas to edit it in place.
4. Set up the hero
Select the Hero block and fill in the content tab:
- Eyebrow text:
Acme Coffee Co. · Promo Verano Cold Brew. - Headline:
Gira la ruleta y gana café todo el verano. It is the only main heading on the page. - Subtitle: one or two sentences with the mechanics and the star prize.
- Button text:
Quiero girar la ruleta. - Button link: choose Anchor to block and
#participar. The button scrolls down to the form. - Image: upload it with Upload or pick it in Gallery. Always write the image alt text.
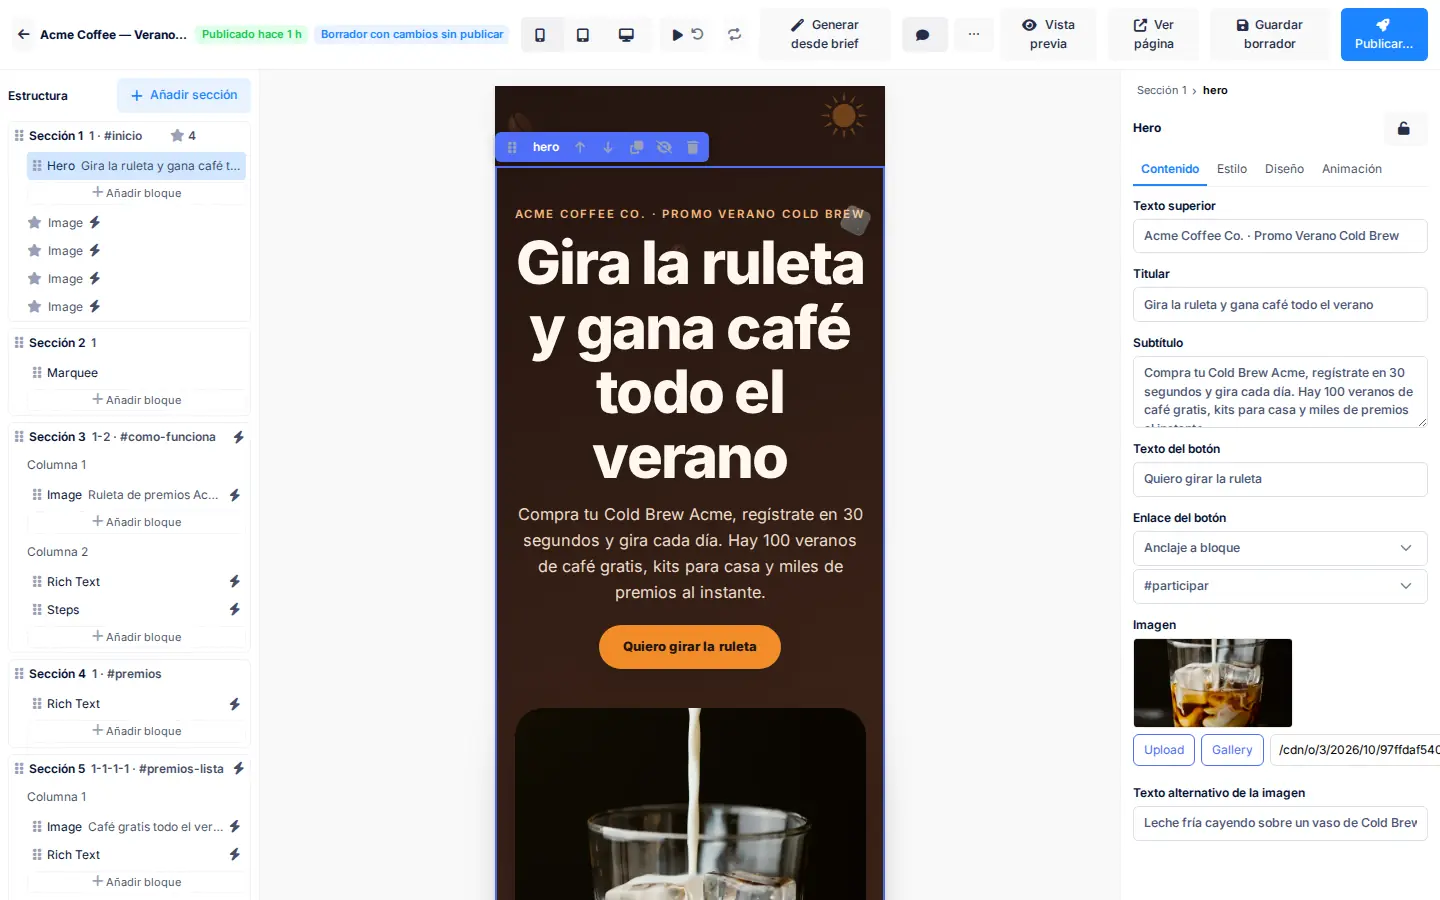
Now select Section 1 in Structure. Under background choose Gradient with the two browns of the kit. In Anchor (for #links) type inicio.
Anchors (inicio, como-funciona, premios, participar, faq, bases) let you link to each section from buttons, the legal footer or a WhatsApp message.
5. Add decorations to the hero
Decorations are free images floating over the section: in the example, two coffee beans, an ice cube and a sun.
- With Section 1 selected, scroll down to Decoration and click Add decoration. Pick the image.
- Select the decoration and open the layout tab. Place it with X %, Y %, W % and H %, rotate it and decide whether it sits in front of or behind the content with the layer order.
- Under mobile behaviour choose Below content, Hide or Keep in place. Acme hides them so the headline has room on small screens.
- Leave Decorative image (no alt text) on: screen readers skip it.
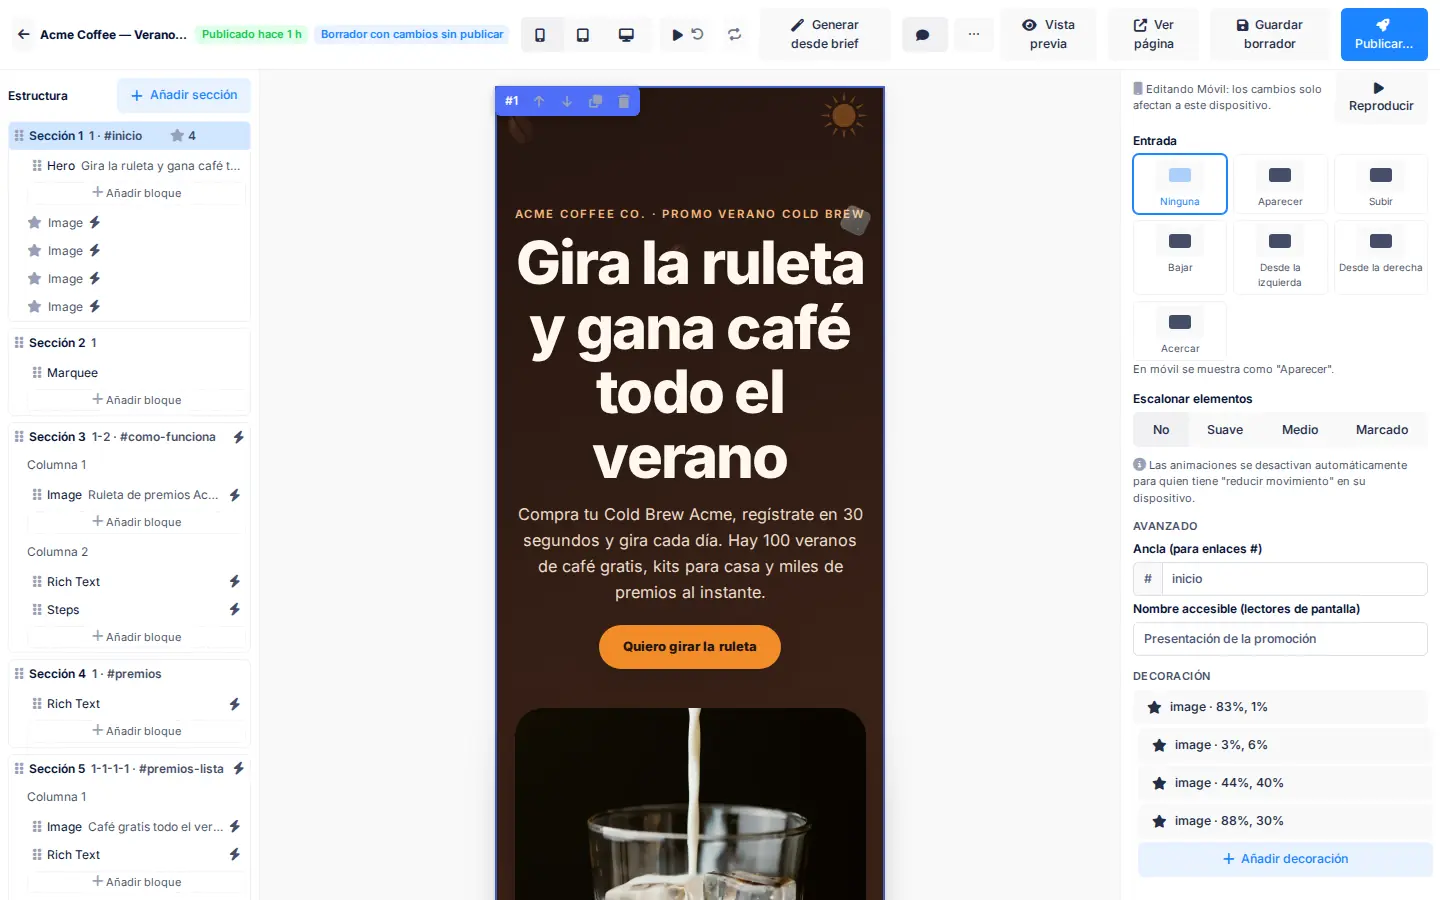
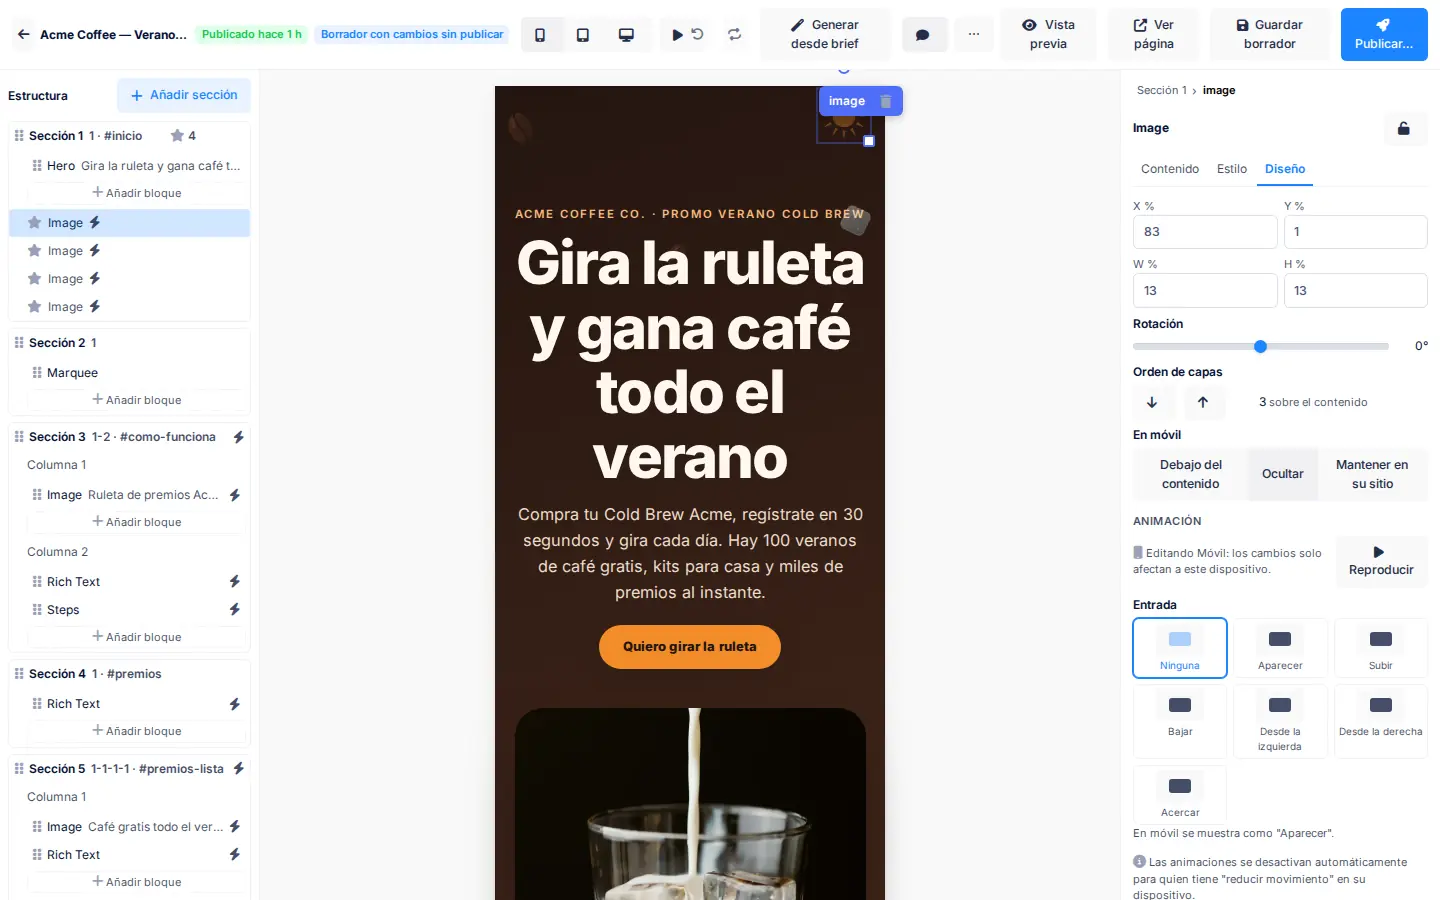
In the example, the hero decorations and the wheel in section 3 move as you scroll (parallax and rotation). The editor shows the resting position; click Play animations to see the movement. Setting this effect from the inspector is in progress. See the "Known limitations" box at the end.
6. Animate block entrances
Select a block, for example Steps, and open the Animation tab:
- Entrance: fade, up, down, from left, from right or zoom in.
- Speed, Delay and Distance.
- First time only: the animation doesn't replay when the visitor scrolls back up.
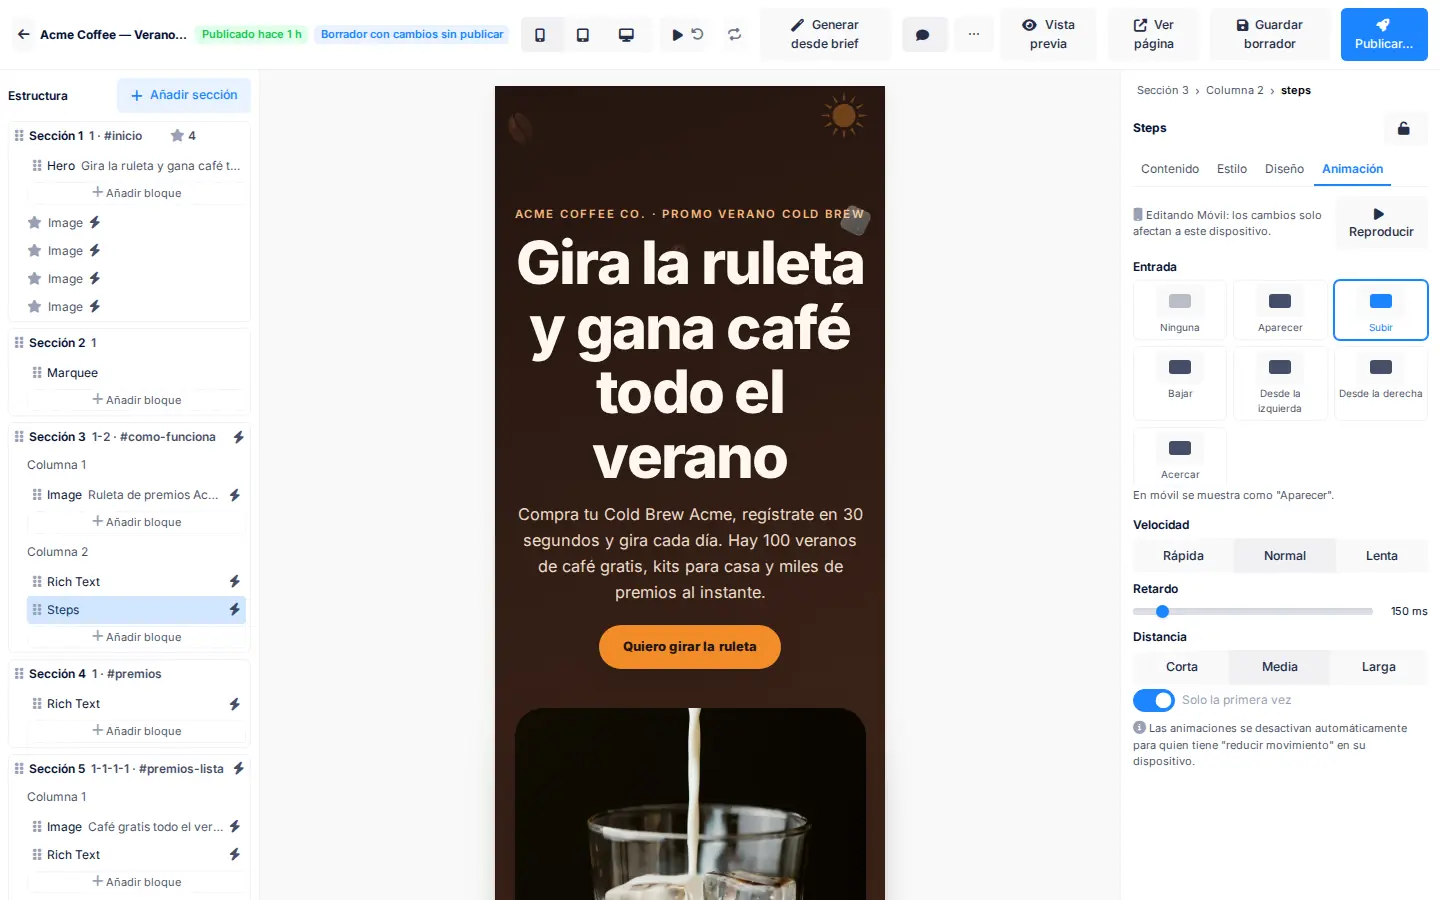
To make the four prize cards enter one after another, select their section and set Stagger elements to Soft or Medium.
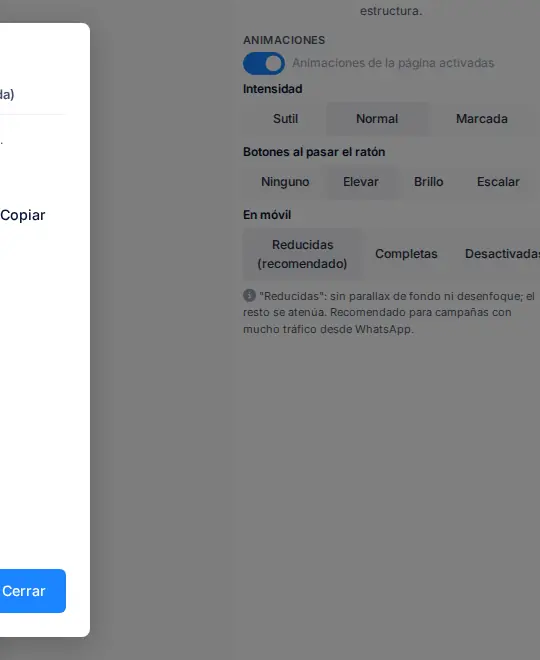
With nothing selected, the inspector shows the page Animations:
- Intensity: Subtle, Normal or Bold. Acme uses Normal.
- Buttons on hover: Lift, Glow, Scale or None.
- On mobile: keep Reduced (recommended). It removes parallax and blur on modest phones.
If the visitor has "reduce motion" turned on, animations switch off automatically. The copy must always make sense without movement. Animations are paused while you edit: click Play animations (Shift+Space) to watch them.
7. Fill in the other blocks
| Block | What to fill in | In the example |
|---|---|---|
| Marquee | Items, each of type text or image. | "Café gratis todo el verano", "Kits Cold Brew en casa"… |
| Steps | Title and description of each step. | Buy, register, spin. |
| Image + Rich Text | One column per prize in a four-column section. | Free coffee, kit, tote bag, −20 % coupon. |
| Stats | Value and label of each figure. | +12k participants, 98 % would take part again. |
| Testimonials | Quote, author, role and avatar. | Three reviews with city. |
| Countdown | Title and target date. | "La ruleta se cierra en", end of the promotion. |
| Footer CTA | Headline, text and button. | "Participar ahora" button to the #participar anchor. |
| FAQ | Question and answer for each item. | Who can enter, how often, how prizes are delivered. |
For the terms and privacy, add a two-equal-columns section with anchor bases and one FAQ block per column. Each part of the terms (organiser, scope and dates, prizes…) is a collapsible item.
8. Set up the registration form with terms and privacy
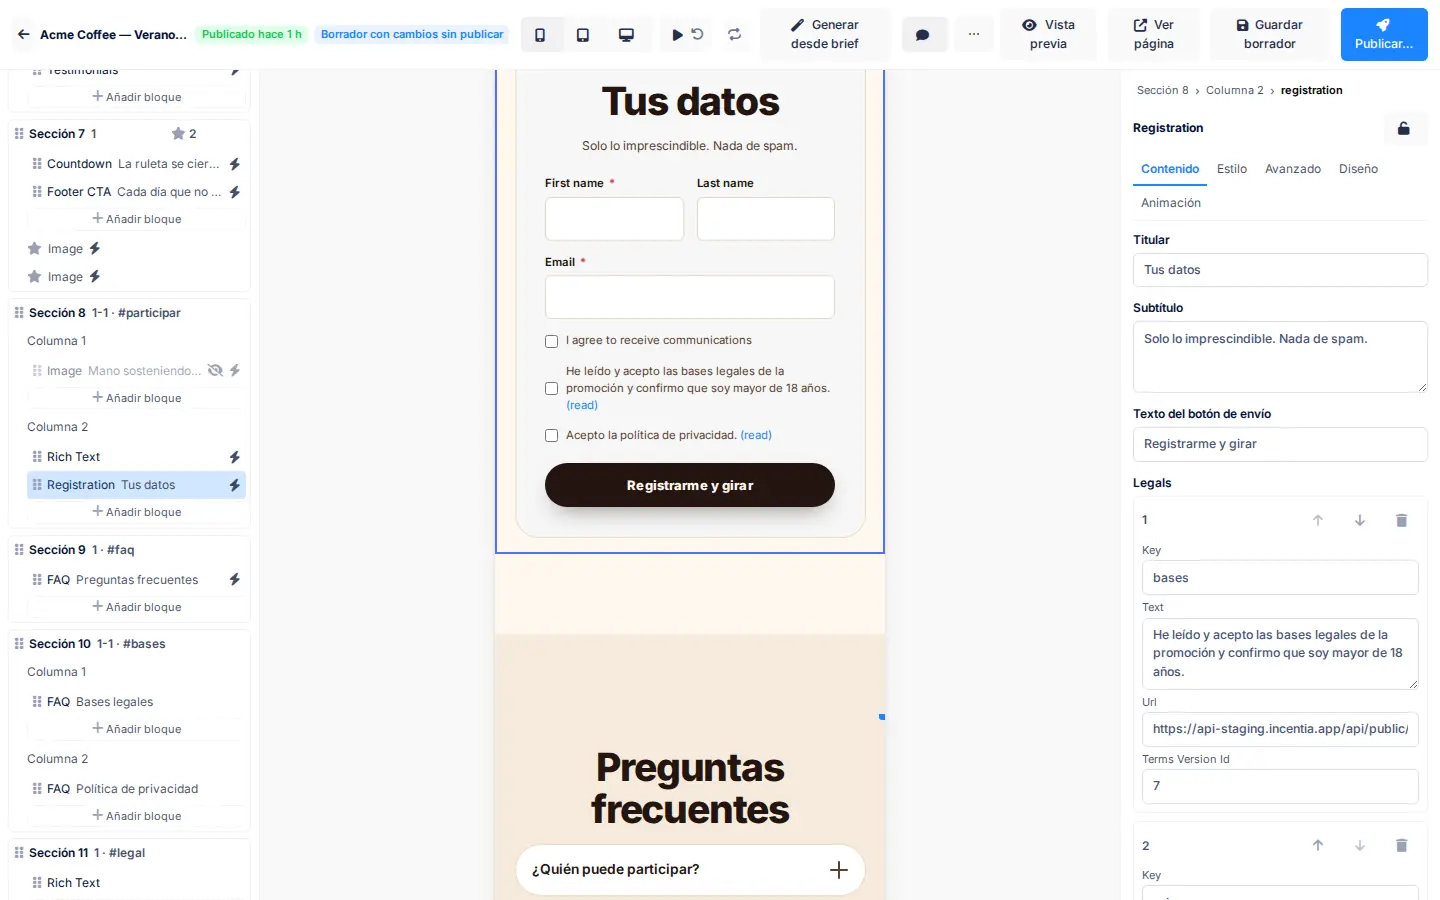
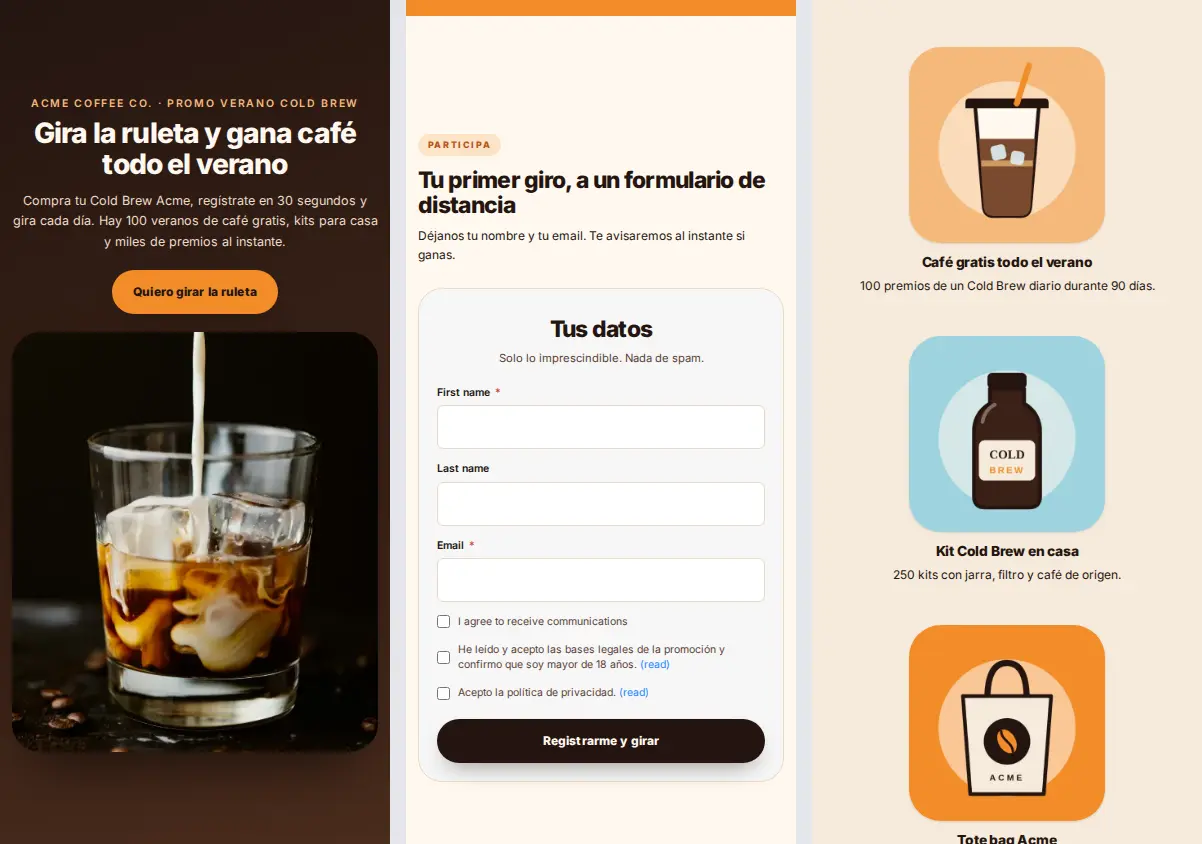
Select the Registration block and, in the content tab, fill in the headline, subtitle and submit button text (Registrarme y girar in the example).
Under Legals, add one checkbox per document with the add item button:
| Field | Legal terms | Privacy policy |
|---|---|---|
| Key | bases | privacy |
| Text | "He leído y acepto las bases legales de la promoción y confirmo que soy mayor de 18 años." | "Acepto la política de privacidad." |
| Url | Address of the published document, or #bases to jump to the accordion. | #bases |
| Terms Version Id | Number of the active terms version. | Optional. |
Linking the terms to their version records every acceptance against the version in force.
Finally, close the page with a one-column legal section with anchor legal. Add a Rich Text block with the organiser and links to the terms, privacy policy, FAQ and contact.
9. Review the Problems panel
At the bottom of Structure, the Problems panel catches issues before you publish. For example:
- The form has no terms linked to a terms version.
- The legal footer or the main heading is missing, or there is more than one main heading.
- Images without alt text, or low contrast.
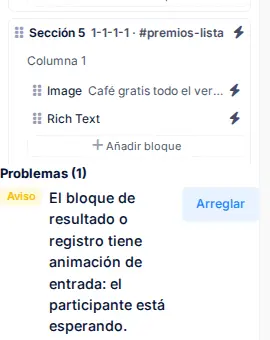
- The first section or the form has an entrance animation, which makes the participant wait.
Click Fix when it appears to correct it in one click.
10. Check the page on mobile
Most promotion traffic comes from phones and WhatsApp. Switch device with the Mobile, Tablet and Desktop buttons in the top bar, or keys 1, 2 and 3.
On Tablet or Mobile, a block's layout tab stores alignment, text size, spacing and visibility for that device only. A blue dot marks it; reset goes back to inheriting from desktop. On a section, Visibility shows or hides the whole band per device.
11. Preview the draft
- Preview opens the draft in a new tab without saving. The link lasts 15 minutes.
- ⋯ › Share preview › Preview (private) tab creates a 24-hour link for people without IncentIA access. You can protect it with Password (optional). Save the draft before sharing it.
- Comments shows what reviewers noted on the shared preview.
12. Publish
- Click Save draft (
Ctrl+S) as you work. The public page doesn't change. - When everything is reviewed, click Publish…. The editor asks for confirmation with the number of changed blocks: "Publish the page? N block(s) changed.".
- The header changes to Published. If you keep editing, you'll see Draft with unpublished changes until you publish again.
To publish later, use ⋯ › Schedule. To go back to the published version, ⋯ › Discard draft. ⋯ › Version history shows earlier versions.
- One message per section and a single primary button that always leads to
#participar. - Use the kit colours, not one-off colours. If you change the kit, the whole page updates at once.
- Real photos with alt text; light decorations marked as decorative images.
- Few animations: Subtle or Normal intensity, no animation on the hero or the form, and Reduced on mobile.
- Keep the terms and privacy one click away from the form, and the legal footer in the last section.
Check that it works
- Click View page: the public address
/landing/c/acme-coffee-verano-cold-brewopens. - Check that the hero button scrolls to the form and that the footer links open the terms and privacy policy.
- Open it on your phone. If your account has campaign subdomains enabled, it also answers at
{slug}-{account}.{your domain}. For example,acme-coffee-verano-cold-brew-demotest.staging.incentia.app. - For the short link and QR code, follow Publish the landing page with a short link and QR.
Some improvements in progress affect this tutorial:
- Page style and brand kit: the public page doesn't yet apply the whole page style or every kit value (for example, fonts). Always check the result with View page.
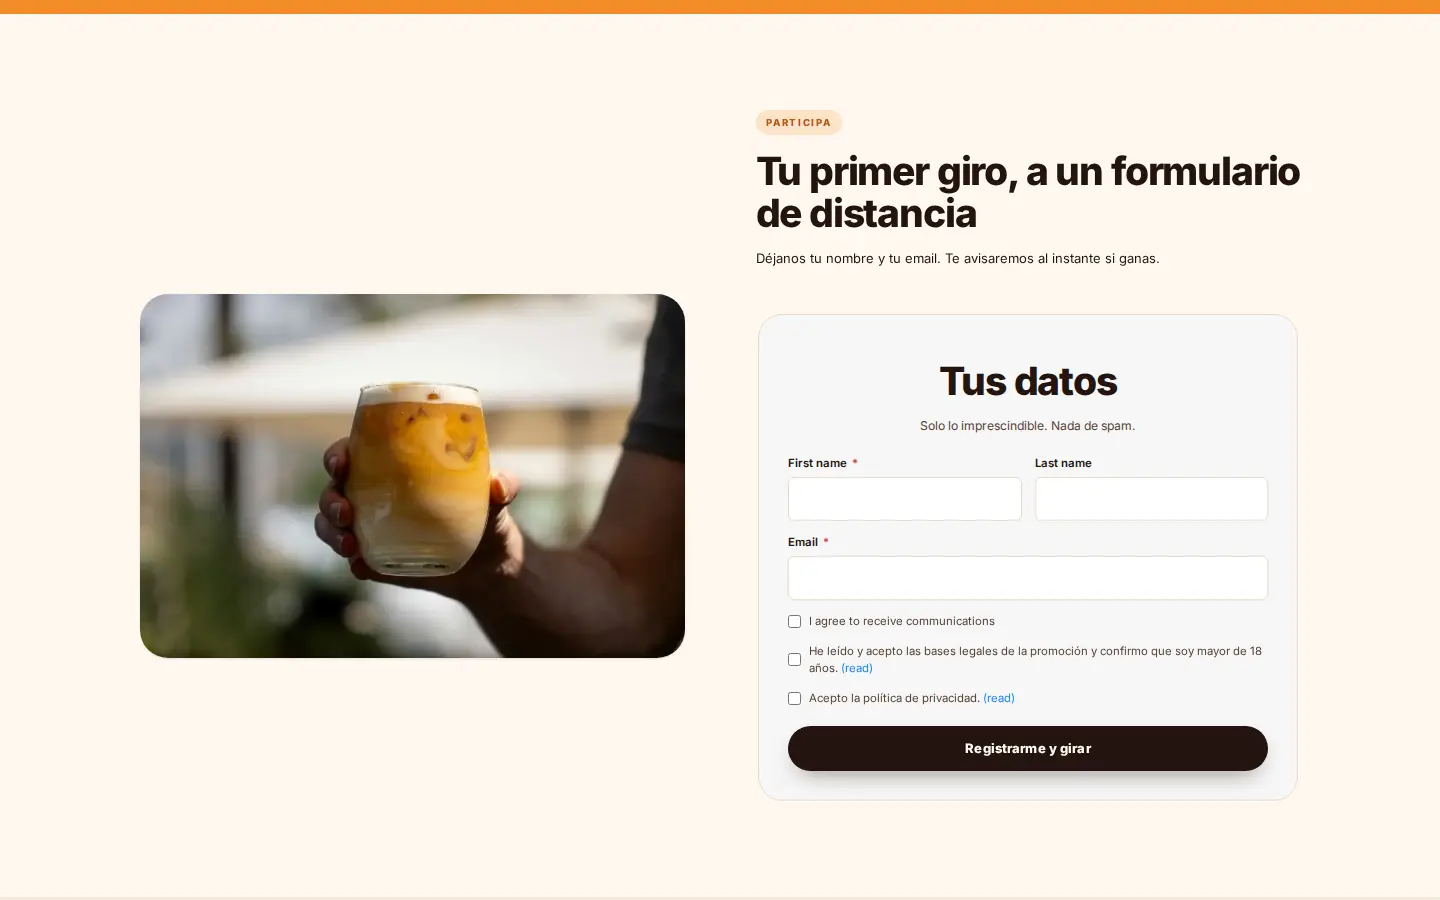
- Registration form in English: some texts on the published form appear in English ("First name", "Last name", "I agree to receive communications", "(read)"), as do the Legals fields in the inspector.
- SVG images: not yet shown on the published page. Upload PNG, JPG or WebP.
- Scroll animation: decoration parallax and the wheel rotation can't be set from the inspector yet.
Next steps
- Landing pages: public addresses, section editor and animations.
- Landing Builder: full editor reference.
- Publish the landing page with a short link and QR
- Launch a games campaign