Stores
This is where you maintain the points of sale where your field reps leave booklets of PIN codes. Menu: Commercial › Stores.
Stores permission · Edition: all (Free, Starter, Pro, Growth, Enterprise)
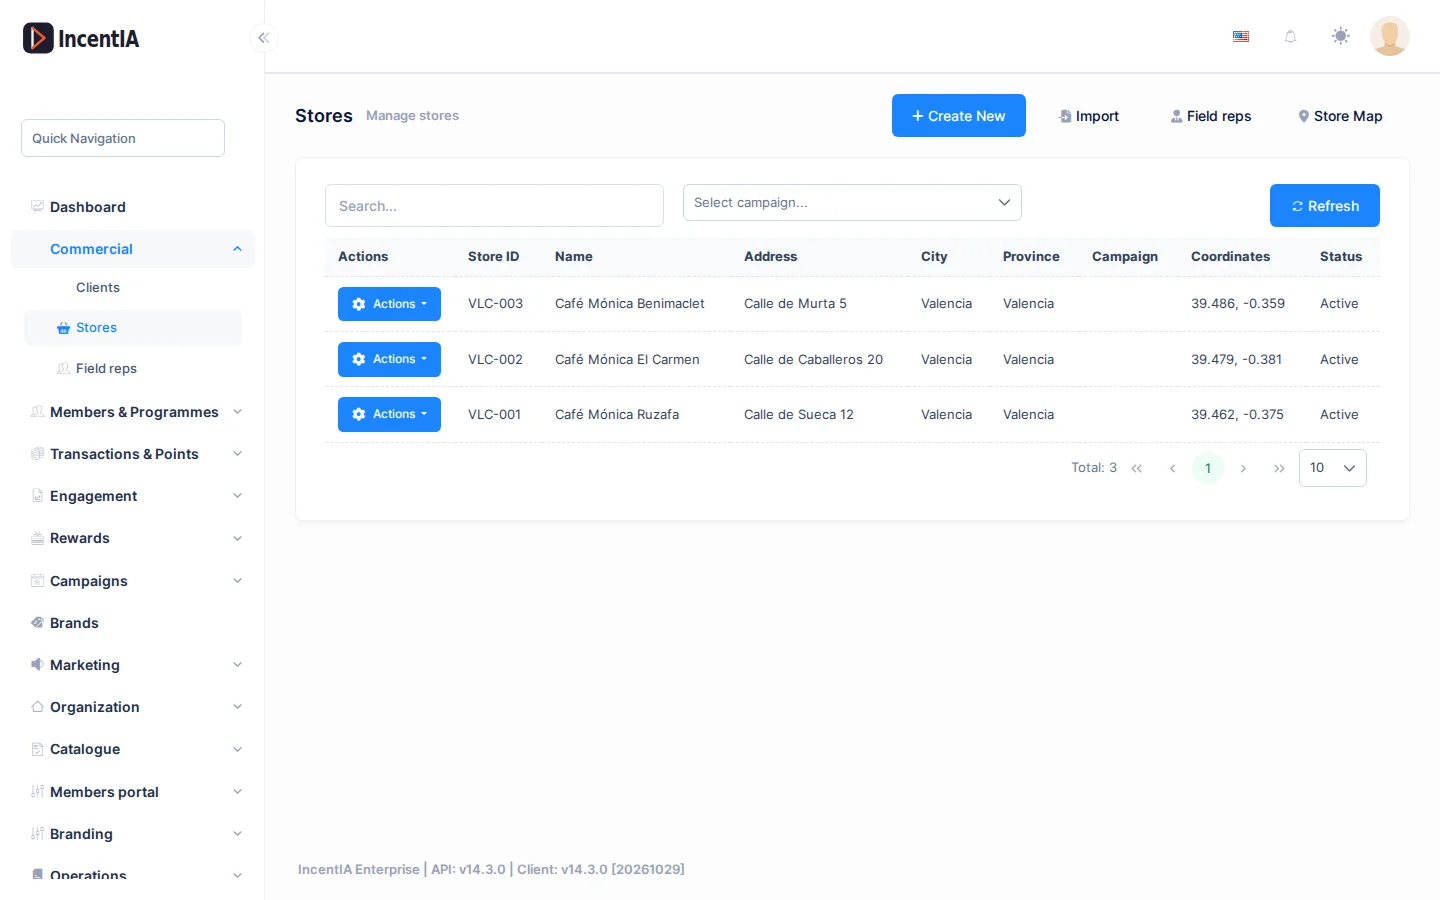
List
The screen has a search box (Search...), a Select campaign... filter and Refresh. At the top right:
- Store Map: opens the booklet coverage map (linked with PIN codes and booklets).
- Field reps: goes to Field reps management. Only if you can manage users.
- Import: loads many stores at once. Requires permission to create stores.
- Create New: manual registration.
| Column | What it is | Notes |
|---|---|---|
| Store ID | Your internal code for the store | Optional |
| Name | Store name | |
| Address, City, Province | Location | |
| Campaign | Campaign the store belongs to | Empty = client-wide store |
| Coordinates | Latitude, longitude | |
| Status | Active / Inactive |
The Actions menu on each row offers Edit, Delete and Booklets. Booklets opens a panel with the booklets assigned to the store (name, who linked it, redeemed / total) and the history of links.
Create a store by hand
- Click Create New.
- Fill in Name (required) and, if you wish, Store ID and Campaign.
- Type the Address and click Search on map. IncentIA geocodes the address and fills in Latitude and Longitude (required).
- If there are several matches, Several matches — pick one: appears. Choose the right one.
- Adjust the point: click or drag the marker on the map.
- Complete Address (continued), Postal code, City, Province, Country and Status (Active or Inactive).
- Click Save.
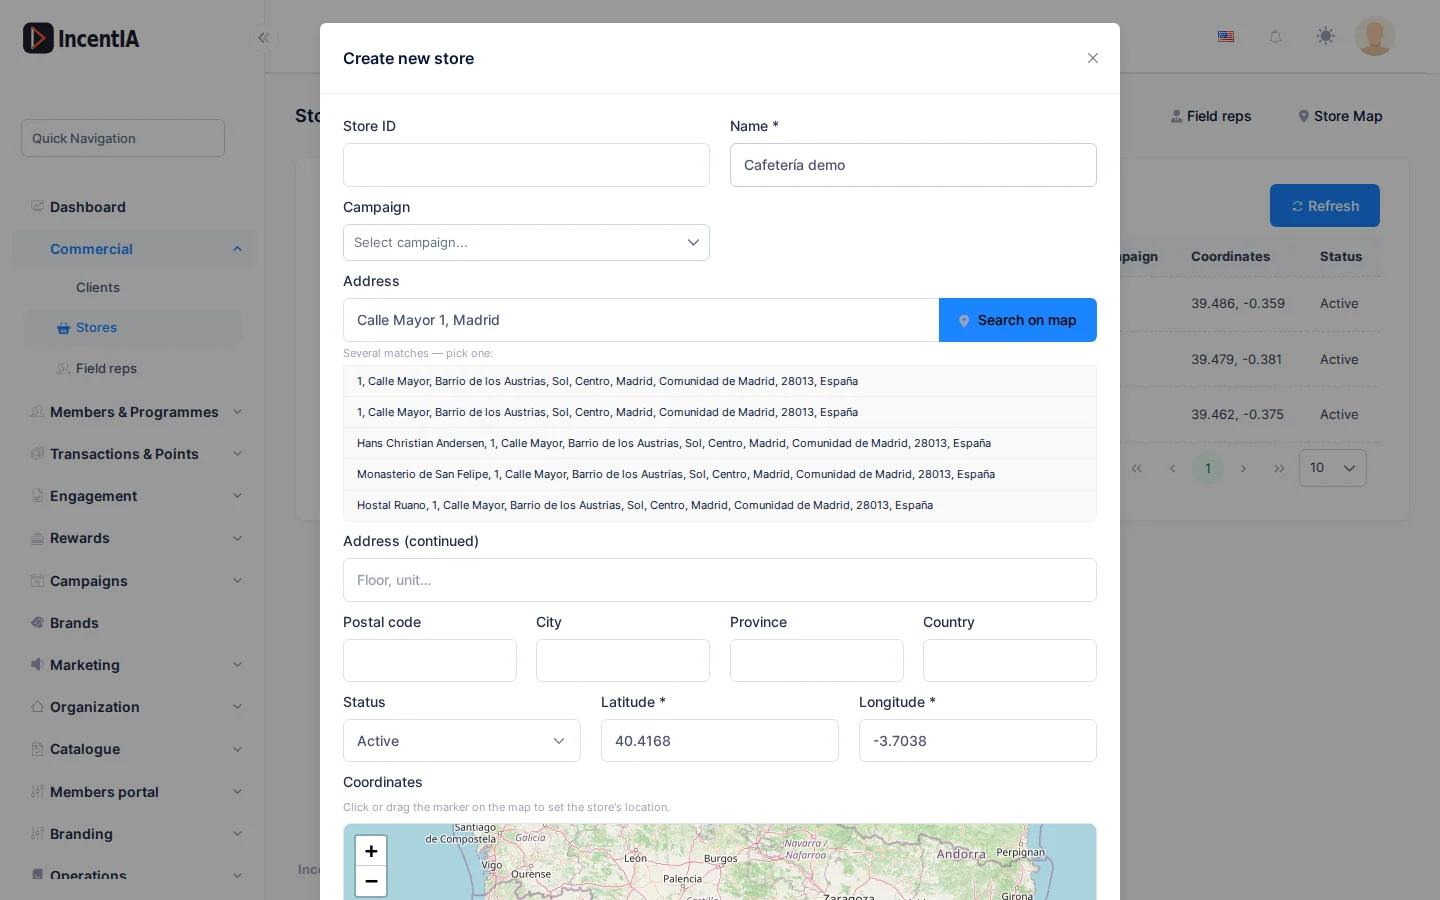
Latitude must be between −90 and 90 and longitude between −180 and 180.
Address search has a usage limit: 20 queries per user per minute, and 500 per account per hour. If you reach it, wait a moment and try again.
Import stores
- Click Import.
- In File (.csv or .xlsx) upload your file. It accepts up to 50,000 rows and 5 MB. If you want to start from the right format, click Download template (.xlsx).
- Required columns:
nombreanddireccion. Optional:ciudad,codigo_postal,provincia,pais,telefono,contacto,latitud,longitud,campana_idandcomercial_email. - Choose a Default campaign if you like. It is used for rows without
campana_id; if empty, the stores are client-wide. - Click Validate. You'll see the counters Valid, Warnings, Errors and Duplicates, and the Issues column per row.
- Tick Skip rows with errors if you want to import only the valid ones and click Import.
Rows without coordinates are geolocated from their address. Duplicates (same name and address) are skipped.
If there are many addresses to geolocate, the import continues in the background (roughly one per second). You can close the window: the stores keep being created. When it finishes you see Created, Skipped and Failed, and you can download the failed ones with Download failed rows (CSV).
Who registers stores
- Administrators, from this screen.
- Field reps, from the
/repapp. They only see nearby stores when linking a booklet; they don't see this list. See Field reps.
Statuses and limits
- An Inactive store doesn't appear among the nearby stores that field reps see when linking a booklet.
- Delete removes the store from the list.
- If the app detects very similar stores nearby when registering a new one, it asks you to confirm it isn't a duplicate.
Permissions
| Action | Permission (UI text) | Technical id |
|---|---|---|
| View list, map and booklets | Stores | Pages.Stores |
| Link a booklet to a store (field reps) | Associate Store | Pages.Stores.Associate |
| Create a store and import | Creating Store | Pages.Stores.Create |
| Edit a store | Editing Store | Pages.Stores.Edit |
| Delete a store | Deleting Store | Pages.Stores.Delete |